


So sad,
The pool went up on Firday. All went splendidly once we got some brute force to come help us. Here is that day in picutures if you haven't already seen the thread http://www.poolforum.com/pf2/showthr...5554#post45554
Then all Heck broke loose.
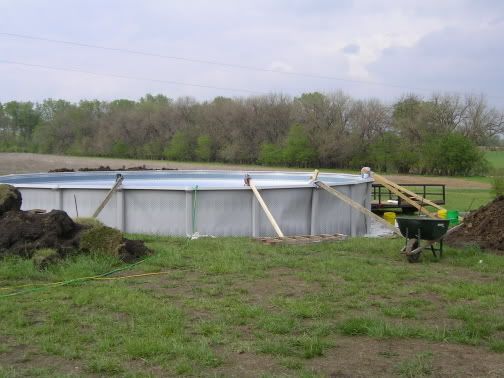
Here is what we have now.
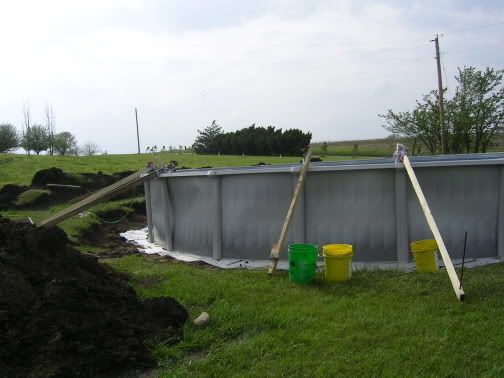
DH braced her back up.
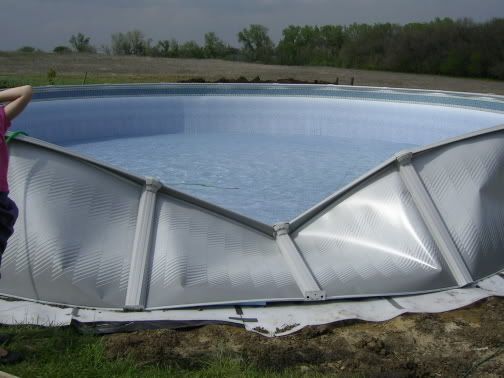
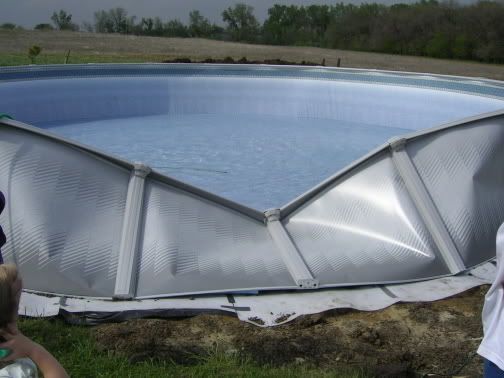
It really really seems like the liner is too small or short.
When we hung the liner and got the seams straight and all that jazz- there was still a half a foot to a foot between the liner and the foam cove and also between the liner and the wall.
The worst area was where we last hung the last part of the liner- it was foot away from the wall and the cove.
We thought it was maybe the wind between the liner and wall, we thought- well this is the way liners should be- they are meant to stretch into place under warm weather conditions.
So we started adding water. Thinking the water and the sun will strech that liner right into place.
NOT !!
By that night we were worried- we saw the liner pulling on the top rails, so we stopped the water & went to bed. We still weren't sure if it was a liner problem or a wind problem.
Saturday morning we turned the water back on. The water made it worse. It started pulling the top of the wall in. Turned off the water.
Then came the big winds and she crashed in.
Tom braced her back up and she held for the day and all night. It rained & stormed all night, there were tornadoes everywhere.
Today it is still pouring rain. The more rain water that goes in the more the walls are buckling in & the liner is pulling the top rails in and down.
At first the problem only seemed to be there on the south side where she crashed in ( also were the prevailing winds we blowing at the pool), But now all around the whole pool the walls are buckling.
If you look under the Top Seats you can see some of the Top Rails twisted inside the Top Plates.
There is not 2" of sand in the bottom b/c the foam cove and Happy Bottom didn't call for it.
We are currently siphoning out water to relieve the liner pull. But the rain is relentless. Tom just left to buy a pump from Lowes.
If there is a break in the rain I'll see if i can get pictures of the other walls sucking in.
Don't know what to do.
Tom wants a professional pool installer to come out here and make an assement of what is causing this- wind or liner.
I will call the internet sales people tomorrow and ask them what they think.
Soooo Sad.
~Hoffmans

 Reply With Quote


Bookmarks